Event 38 Mission Planning & Mapping Workflow Updates

Image E38MissionPlanner.JPG

For anyone using Mission Planner as a ground control station, check out these additions we’ve made to streamline MP to our workflow. We typically run mapping missions on fixed wing aircraft at Event 38, so these are tailored to that use, but some of our features are more general purpose. I’ll outline the features we’ve added below and open up to comments about what you think should be merged into the master Mission Planner codebase. Let us know what you want!

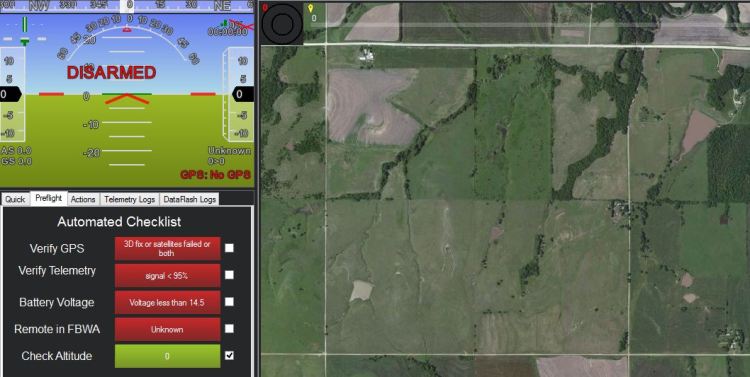
Automated Pre-flight Checklist

We’re finally coming out of the dark ages, no more paper checklists! Mission Planner already has all telemetry data at its disposal, why not have it help check off setup criteria too? While the E384 boots up and self checks out each subsystem, the operator goes through the physical inspection and completes the checklist. Green means go!

Accessible Flight Planning Functions

To improve the speed and ease of planning a mapping mission, we’ve taken the most common functions from Mission Planner’s right click menu and made them more accessible by placing them in the right hand pane in the Flight Planning tab. Sometimes the most simple changes can be the most appreciated!

Cam Message Indicators

Mission Planner now leaves a trail of markers where each picture was taken, making it simple to tell when an area is not being covered as expected. If the aircraft is at a high pitch or bank angle when the picture is taken, the icon appears yellow to warn you that additional coverage in the area may be needed.

There are a few more updates, admittedly more specific to the E384 platform, but feel free to check out the full list here on Droneyard. We’re in the process of joining the Dronecode foundation and will work with the dev teams to get these features integrated into the next Mission Planner release. In the meantime, feel free to check out our source code on github, or just go ahead and use our compiled version right away if you want (Click Mission Planner for Event 38 at the top of the page).

SOURCE: Everyone’s Blog Posts – DIY Drones – Read entire story here.
Drones in the Classroom

Image nathanprogrammingscorebot.jpg

Anyone in the field of technology would agree that the most daunting task is keeping pace with the changes that occur almost daily. What is state of the art today will be obsolete in a few years or even months. Schools try to keep up, but budget constraints affect even the most affluent schools. How could disadvantaged schools in rural communities have a chance to give their students a modern classroom with the tools students need to be successful?


The future of aviation is at our doorstep.

Unmanned Aerial Vehicles, Remotely Operated Flight, Unmanned Aerial Systems, and Drones, are all names that are currently filling the news. Originally only associated with the military, Unmanned Aerial vehicles (UAVs) are becoming mainstream and readily accessible to the public. With the advancement of electronics, batteries, and motors becoming smaller and cheaper, it is now possible for anyone to build his own remotely piloted vehicle.

When Unmanned Aerial Vehicles (UAVs) is offered as a unit of study, the teacher has an opportunity to immerse his students in both introductory level activities and advanced design challenges. The UAV activity offers additional design problems and challenges that teachers can add to as they see fit. The course will teach students about the principles of flight, aircraft construction, and electric power systems while using modern manufacturing processes such as 3D printing and CNC machines. The unit focuses on an Introduction to UAVs, basic electronic control, mechanics, design engineering, scientific process, project management, problem solving, teaming, and the development of workplace competencies. The explorations are designed to allow students to begin to understand the digital world in which they are up. They will develop the project management skills that today’s managers need, as well as make connections across multiple disciplines.

Background

Mr. Anderson has been developing this program off and on now for a couple of years. In 2006, he came across a few old projects that the previous students had been working on. One of them was an old gas trainer RC airplane. He pulled it out from storage and hung it up in the classroom. It generated a lot of interest amongst the students and they wanted to fly it, but only a licensed member of an AMA club is permitted to fly a gas plane. You also need a lot of space.

Mr. Anderson did some research and came across a website that had a section on “scratch built foamies,” which are small lightweight airplanes made out of foam board. It seemed to be a great way to introduce students to many concepts related to design, manufacturing and the principles of flight.

The students were so enthralled about making planes, that Anderson made it a classroom project. “There is quite a learning curve to understanding all of the parts, systems and processes that go into building a plane from scratch. I have put a lot of time and research into this program, refining and developing activities. I believe that it is a great activity that can be taught using almost any technology education setting for those that are willing to put in the effort.” (Mr. Anderson)


The next chapter

Integrating flight into the robotics curriculum

Our robotics class helps to train students how robotic systems interact, and how they can help design systems for the future.

Students at our school come from a variety of backgrounds which include the spectrum of occupations in our community. We are also isolated geographically from events and experiences that larger urban areas can access. Students have limited opportunity to visit locations to experience educational activities. Our school is attempting to bridge that gap, by providing classes needed to be successful in the 21st century. Our robotics classes are a part of a larger STEM (Science, Technology, Engineering and Math) pathway that encompasses curriculum extending down to the elementary school. Starting in 6th grade, students are introduced to programming using LEGO MINDSTORMS. In high school, students continue learning using VEX ROBOTICS and eventually to designing and building robots from scratch using CAD software and CNC machines to cut them out. Students program the robots using Robot C to compete in area competitions including BOTS IQ and Battle BOTS. This pathway gives students experiences, training and valuable insight into the world of engineering to prepare them for careers in STEM related fields.

By showing students that robotics is multi-faceted, encompassing land, sea, and air, students will have a better understanding of how we can use robots to help study our world. With help from our community and partners in education like 3DRobotics, our students are being trained to take the next step into STEM careers, preparing them for the jobs of the future.

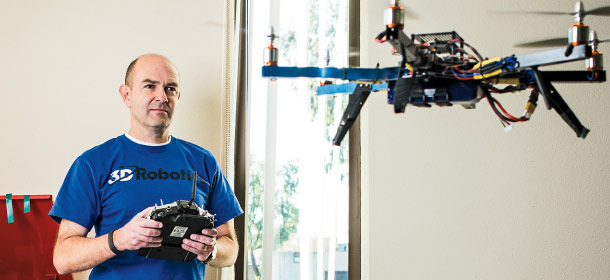
Tyler Anderson (age 14) flying the Iris+ Drone for the first time

SOURCE: Everyone’s Blog Posts – DIY Drones – Read entire story here.

SMARTPLANE Drone Plane with Application and Hardware Platform

Image diy.png

We are happy to announce you the launch of our Smartplane drone campaign on kickstarter. 

https://www.kickstarter.com/projects/745804289/smartplane/video_share

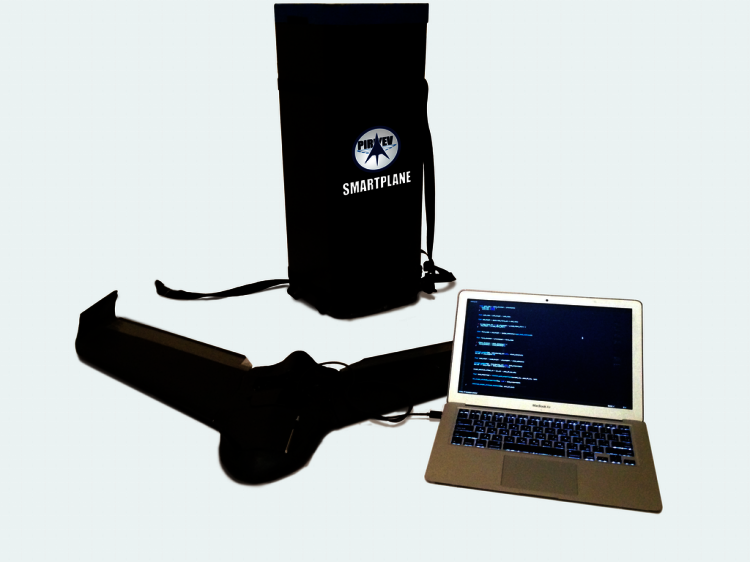
Smartplane is a customizable  drone plane  with Software Development Kit (SDK), and with modular Hardware compartment. You can directly connect 3rd party hardware and start writing applications with SDKs. This enables you to create your own aerial projects and not to worry about the aeronautical and electronics aspects on a drone. Smartplane flies 80 minutes. It can carry your payload up to 300gr when it’s simply plugged onto it via USB or Ethernet port.

Numerous drone development activities show the clear interest in the market. However, we saw that most of the attempts fail to achieve an acceptable flight dynamic. Be it flight time or payload, it just didn’t make sense to us to have a device that only flies below an hour and even less with the payload. On the other hand, the ones that achieve satisfying flight dynamics were ridiculously expensive. We have engineered and designed Smartplane with performance and cost effectiveness in the center of thought. Be it advanced materials or efficient structures, we are striving for a long endurance and powerful drone –affordable by everyone!

Do you have an aerial project? Develop and fly it on Smartplane! Or just select an existing option from the hardware store.

Naturally each phase of the development, prototyping and manufacturing a drone in serial production, requires a lot of resources. As we constantly look for investors, we have now launched our kickstarter campaign. Looking forward to your support! Please share with those who could be interested…

Best,

SOURCE: Everyone’s Blog Posts – DIY Drones – Read entire story here.
New Drone Show on the block

Image epictv.png

This time coming out of the UK from EpicTV makers of online extreme sports video content and drone re seller. Nice show, I appreciate the humour.

Blast this embedding! It does not work the video is here

http://www.epictv.com/media/podcast/the-new-dji-and-3d-robotics-drones-are-about-to-hit-the-market-%7C-flight-club-news-ep-1/602044

SOURCE: Everyone’s Blog Posts – DIY Drones – Read entire story here.

Introduction to Sparky the FarmDogg

Image melissainnapa.jpg

Hello DIY Drones community!

I am Melissa Brandao, creator of the FarmDogg and Founder/CEO of Rogue Rovers. We’re based in Southern Oregon in the amazing Rogue Valley. This is really new for me, but I am really happy to be a part of this DIY drone community. Sharing is exciting and scary all at the same time but, I got some encouraging words from one of the most amazing individuals in tech today–Chris Anderson of 3D so here we go!!


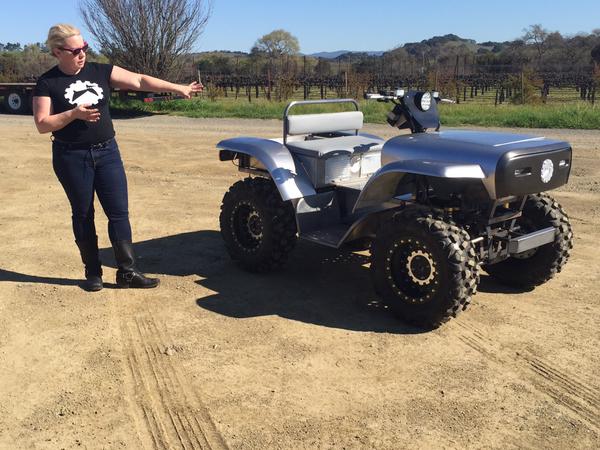
The FarmDogg is an all terrain, electric, semi-autonomous vehicle for specialty farming, This is our prototype Sparky.

 “Sparky” was just made his SF debut the MakerCon event this week.http://makezine.com/2015/05/13/electric-atvs-coming-farms-near/

I’m always happy to expound on why we are building Sparky–but to keep it short and sweet. Ag vehicles, tractors, ATVs are ridiculously dangerous and haven’t seen any real innovation in design since they were created. In the case of the tractor you only need watch tractor fails on youtube to know that there’s a big problem. It’s not just the structural soundness it’s the fact that farmers work on and off these machines and in close proximity. Multitasking in a car is never a good idea but we do it with some level of confidence knowing that 99.9% of the time the surface is steady and the car is designed for smooth straight and fast.

In farming you face a wide array of multitasking in ever-changing envrionments–operating equipment, checking plants, human interaction with the machines-obstacles, terrain changes, etc.

Likewise with ATVs/Quads which have become the ubiquitous machine of choice for many farmers as the rows between crops get narrower are heavily used and not really that right for the job.

ATVs emerged from motorcycles–a la the 3-wheeler, but that straddle seating design has remained even into four wheels. The high center of gravity, short wheelbase and track and continued increase in overall weight combined with that straddle seating design makes it nearly IMPOSSIBLE to free yourself if you get into trouble and feel the vehicle start to go. When the ATVs get loaded up with equipment in front and rear that difficulty just increases exponentially.

Anyway, this was the thinking behind the FarmDogg. Make something better–safer, more sustainable and then add a bunch of smart systems so that we can help to improve farm efficiency and safety at the same time!!

We built the FarmDogg from the ground up as an all electric vehicle so we could

1) entirely control the packaging design (ie. eliminate the straddle seating)

2) entirely control the powertrain (stabilize speeds, robotize it)

3) improve accuracy of data collection by reducing noise, emissions, vibration

4) modular-ize the design so that we can provide open source design to farmers that want to build their own racking

Sparky currently has:

-2 KLD hub motors in the rear with 10Kw of power.

-2 KLD 3.2 kwhr batteries on board

-2 sevcon Gen 4 controllers

-and a lot of other bits and pieces like 12volt, USB, 120 volt charging, waterproof handsfree bluetooth audio (a crowd fav–it’s way better listening to music than an engine for hours on hours)

Now that the event is over Sparky is heading back into the garage for some well needed updates and to start working on the robotics integration. First we’re replacing the existing motorcycle steering with a cool little Formula 1 steering system we are designing with the use of the original modifications and engineering.

We’ll be adding:

-sevcon auto steer

-honda odyssey fl250 steering which we’re modding to include throttle, etc

-new steering mechanism

We’ve got some work on the front end to plan for hub motors for the all 4WD version.

We’re going to use the ardu-pilot for rovers and I’m sure we’ll have some tweaking to do between analog and digital com via CAN-Bus. 

We’re also going to bring in some audio commands because of our whole “doggnition” thing, which you can read more about on our website–and I’ll write about later…

Please feel free to share and discuss. I’ll be posting more updates as we get going–feel free to contact me melissa@roguerovers.com we’re on twitter @roguerovers facebook and instagram too with the same moniker roguerovers 

(though I’m thinking i’ll probably set up a page for sparky as he goes through this amazing transformation. 

Cheers

Melissa Brandao

SOURCE: Everyone’s Blog Posts – DIY Drones – Read entire story here.

Georgia Tech Aerial Robotics(GTAR) wins American Helicopter Society(AHS) Autonomous MAV Challenge

Image ahs_comp.png

Georgia Tech Aerial Robotics Club is team of undergraduate and graduate students that compete in aerial vehicle competitions yearly. The MAV Challenge was last week in Virginia Beach. 

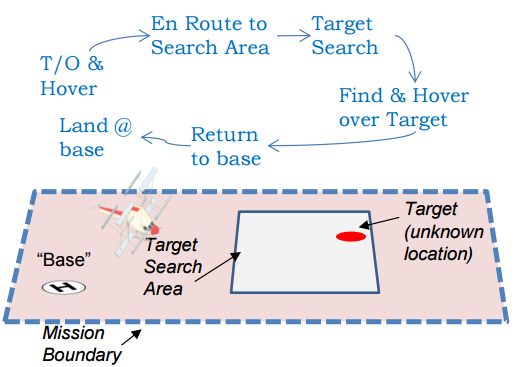
The mission consisted of taking of from a helipad and searching a known search area(20 ft squared) for a target. Once located the vehicle must hover over it for approximately thirty seconds. The vehicle must then transition back to the helipad and land. Our team was able to complete the mission fully autonomous. The arena dimensions are 100ft x 35 ft.  The vehicle also is limited to 500 grams and under 1.5ft in any dimension.

A vehicle was built around a powerful computer and sized with the Georgia Tech Electric UAV Flight Time Calculator(http://controls.ae.gatech.edu/dbershad/EMSTAirTimeCalculator.html). This helped us increase our flight time from 2-3 minutes(last years vehicle) to 8-10 minutes(this year). The tool also helped us determine right size propellers and battery to use. 

We use an APM 2.6 board for sensors data. We wrote code to send all the sensor information(very easily I might add thanks to all the contributors) to our computer that would process the information and then send back motor commands to the APM. The only time the APM does any processing is when the vehicle is in manual mode(stabilize mode). We are very happy with the APM and integration time was very quick. Possibly in the future we might switch to pixhawk board but we will have to see if we can determine the increase in performance is worth extra costs(maybe 3DR could sponsor our team :) ). 

Other sensors that were used are a monocular camera and maxbotic sonar. We originally used the apm to process the sonar but found the analog line to be noisy when compared with using the digital line(feed thru ttl usb). 

Without further adieu here is video from competition(first video with ground station view, second raw footage):

https://www.youtube.com/watch?v=LLHToSvsHgE

https://www.youtube.com/watch?v=2Nddeyb5HRA


We’d like to thank APM contributors for making it easy to work with the ArduPilot. Our website is here(http://www.uavrf.gatech.edu/gtar/) which is a work in progress.

SOURCE: Everyone’s Blog Posts – DIY Drones – Read entire story here.

DJI Phantom FC40 Prop Guard

Image s404471338187152804_p21_i1_w1200__69552.1414642908.200.200.jpg
DJI Phantom FC40 Prop Guard

One set of DJI Phantom FC40 Prop Guards. Includes four prop guards for your Phantom FC40 quadcoptor. Designed to protect your propellers during collisions. They will also help you fly with confidence, whether you are a beginner or an expert quadcopter pilot.

Thi..

Price: $19.00

SOURCE: Ready Quadcopters: New Products – Read entire story here.

Parrot AR.Drone 2.0 Elite Edition Quadcopter Drone

Image 41gUoRsawiL__18359.1414645352.200.200.jpg
Parrot AR.Drone 2.0 Elite Edition Quadcopter Drone
The Ultimate Wi-Fi Controlled Quadricopter
If you want a quadcopter that is more technical then this is the quadcopter for you. Most enthusiasts will say that this is a big more of a toy than an actual device to film or to fly agressively since it i..

Price: $399.00

SOURCE: Ready Quadcopters: New Products – Read entire story here.
DJI Phantom 2 Case

Image gpc_xb_dji_vision_1__27648.1414713352.200.200.jpg
DJI Phantom 2 Case

The Go Professional Cases XB-DJI-VISION Hard Case for DJI Phantom 2 Vision is a water-jet precision cut hardshell travel and storage case with a custom foam interior. It is designed to be impact- and drop-resistant and remains water-tight even if briefly submerged in water. The interior f..

Price: $209.00

SOURCE: Ready Quadcopters: New Products – Read entire story here.

Walkera TALI H500 Black Battery

Image 41qYDFptpyL__55076.1415154498.200.200.jpg
Walkera TALI H500 Black Battery

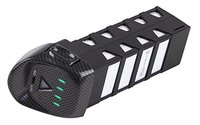
It’s always good to have an extra battery for your Tali H500, especially when you are looking to be up in the air for a while! This is the Walkera TALI H500 Black Battery TALI H500-Z-22 (22.2V 5400mAh Li-Po) which is the brand new battery for the Walkera Tali H500 Black version. This is a ..

Price: $146.00

SOURCE: Ready Quadcopters: New Products – Read entire story here.

Walkera TALI H500 Black Propeller Blades

Image 41g91M1_oTL__16438.1415155485.200.200.jpg
Walkera TALI H500 Black Propeller Blades

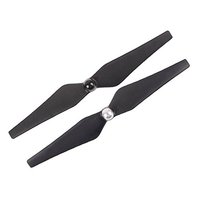
The number one thing you break on any sort of quadcopter or drone is the propellers. With this pack of Tali H500 propeller blades you will make sure you have extra for when you inevitably break a couple. These blades are self tightening so you don’t have to worry about them coming undone ..

Price: $34.00

SOURCE: Ready Quadcopters: New Products – Read entire story here.
Hubsan X4 Aluminum Carrying Case

Image HubsanCarryingCase4__16804.1420689916.200.200.jpg
This is the front view of the aluminum case for your Hubsan X4 quadcopter drone.

One thing most people don’t think too much about when you first get your quadcopter is that you will eventually want to carry it to where you want to fly it. While the Hubsan x4 is small enough to almost fit in your Jacket pocket, you really are going to want a carrying case to keep it safe. Th..

Price: $49.99

SOURCE: Ready Quadcopters: New Products – Read entire story here.

DJI Inspire 1 @ Leo Carrillo

Image cropped-Final-1024x257.jpg

cropped-Final.jpg

Leo Carrillo is a beach quaint beach on the northern end of the beautiful Malibu Coastline. Ever since I was a kid I remember camping at the campsite across the freeway and coming over to the beaches for long days full of relaxation. Naturally, It’s one of those places that resonates deep in my heart so I have to photograph it from my Quadcopter!

Leo Carrillo is named after an actor who was extremely passionate about conservation. Carrillo served on the Beach and Parks Commission, and helped a lot during the acquisition of the Hearst property in San Simeon.  It’s been interesting to see how the waves erode the caves over the years, hopefully soon I can do some 3D mapping of the rocks during low tide and compare in 5, 10, and 15 years.

“Here I am” Pose while flying at Leo Carrillo. I’ve been compiling images of myself front he beginning and ends of my flights. For a while when I catches my Phantom I would spin in a circle  with the camera pointed at me so I can cut them together. What also works is a Dronie, a photo or video of yourself while the quadcopter is in the air.

DCIM118GOPRO

SOURCE: Quadcopter Guy – Read entire story here.

CTRL.ME Showroom Opening

Image IMG_2012-768x1024.jpg

Processed with VSCOcam with a3 preset

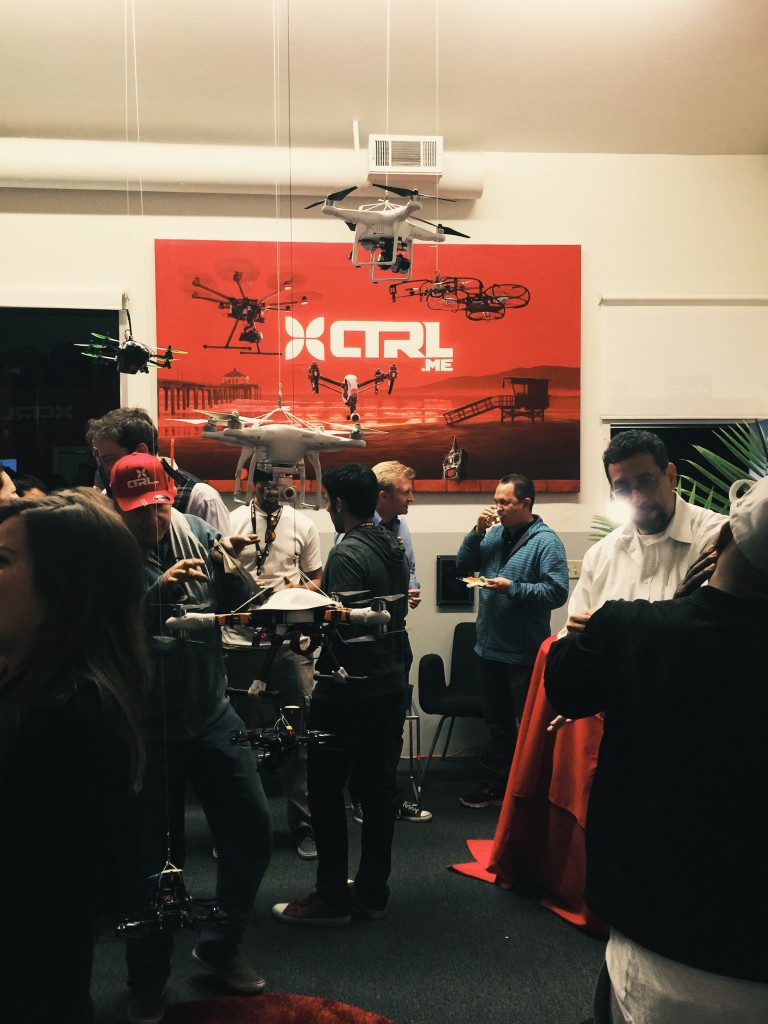
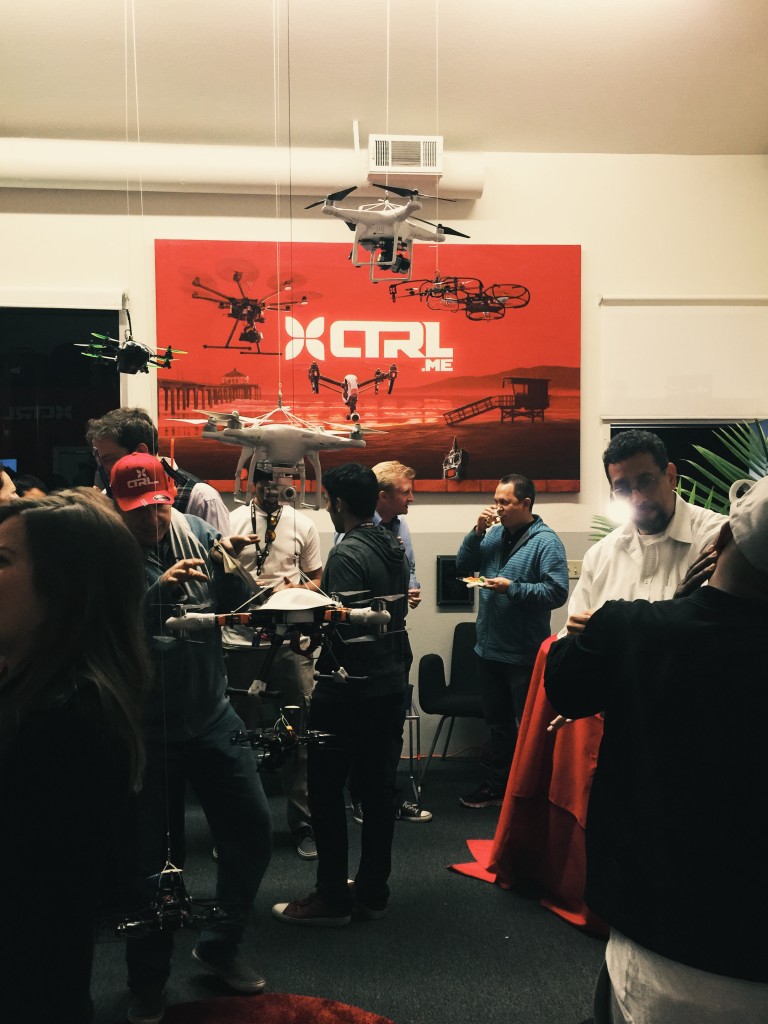
CTRL.ME Has absolutely solidified themselves as a key player in the Drone industry. With the bulk of their business being custom projects they’re pushing the limits of what this technology can do. It was nice to see people from a lot of different age ranges and lots of women too! Throughout the night there was Drone related give away’s, VR Goggle experiences, beautiful drones on display, and awesome demo reels playing everywhere. I especially liked the “Drone Christmas Tree” where they suspended a bunch of different multicopters and made for a really cool display. At the end of the night I had to lay under it and take a picture.

Processed with VSCOcam with n1 preset

One of the many innovations displayed last night was the Skysence Charging pad. The charging pad has complete 100% positive and ground connectivity on the surface and will charge your quadcopter’s battery automatically upon landing to make your system completely autonomous for weeks at a time.

Processed with VSCOcam with hb1 preset

The Bird is the newest copter I have seen from CTRL.me. Built on a custom CNC’d Tricopter frame and being shaped out of foam makes this copter lightweight and easy to fly. The Octo-Claw is a multicopter for trickery. With the integrated claw it enables delivery or pickup of goods from the air without getting the airship too close to anyone. The huge quadcopter you see on the bottom left was a special design made for flying gold bars into an event. The guys at CTRL.ME never stop short of delivering the most mind blowing experience for their clients.

Processed with VSCOcam with a5 presetProcessed with VSCOcam with a6 preset

The copter below has to be my favorite, and has to be a huge contributing factor as to why i love CTRL.ME so much. Ever since I got a mini I’ve been dreaming of putting a gimbal onto a <300 fame. While in the shop one day I made the suggestion to make a mini X8 with a gimbal. A few weeks later I get a text message from Adam with a photo of the beautiful copter you see below. I will hopefully get to take it out soon and run some tests with the cute little guy.

Processed with VSCOcam with a3 preset

These hoop copters are the next level for interactive flying experiences. After taking off there is a motor that spins the hoola-hoop around the Hexacopter. In the hoop is sound activated LED lights that will change colors depending on the environment you put them in. In building them, the guys said they had to do very little tuning to the NAZAV2 to get it to fly right. With the ring spinning it does not effect your flight performance at all. While the copters were up in the air I was graciously handed a controller and was able to fly one of these guys; something I’ve wanted to do for a very long time.

Processed with VSCOcam with a6 preset

Processed with VSCOcam with hb1 preset

The well known Drone Dudes was there showing their newest gear and footage. With their new  line of awesome hats, shirts, and other small items that are Drone related they are bound to be in a closet near you. The talented NKDSGN has been in collaboration with Drone Dudes working on the design of the apparel line. Drone Dudes had their kickass van with Plasma FPV screen TV in the back playing various aerial reels they’ve accumulated over the years. The Drone Dudes have a studio in DTLA where they invite different people working on innovative technologies and push the limits of what is possible.

IMG_5608Processed with VSCOcam with h3 preset

Overall the night was amazing. There was always a copter in the air, things to watch, experience, touch, and ask questions about. CTRL.me is not just a quadcopter distributor or re-seller. They are pushing the limits of this technology more and more each month and It’s been awesome to watch blossom.  If you want to stay connected with CTRL.me check their website, youtube channel, Instagram, and Twitter.

SOURCE: Quadcopter Guy – Read entire story here.

Arroyo Simi Community Park Sunset

Image Untitled_Panorama2-1024x312.jpg

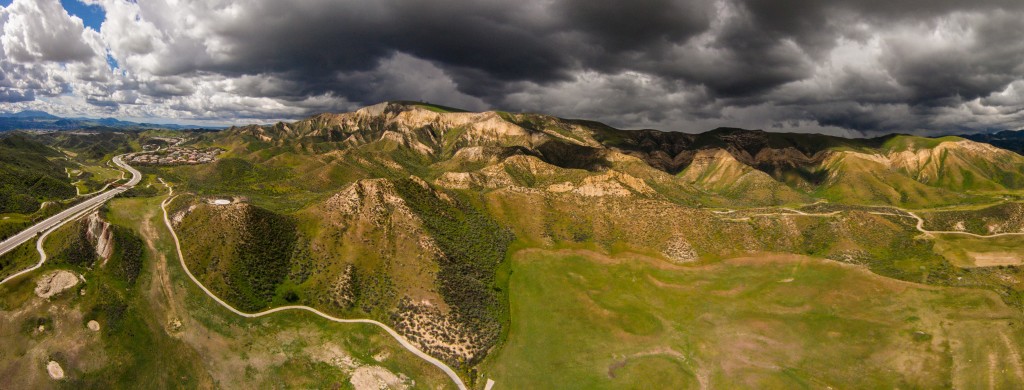
Untitled_Panorama2I’ve been wanting to photograph this hill for a while now. I can see it from my backyard and I’m always fascinated with how the light hits it at sunset. What made me love this photo even more is the fact that the hill is green, as opposed to brown the rest of the year. California has been in a rough drought and the recent rain has been bringing colors to life in the mountains.

Processed with VSCOcam with s3 preset

SOURCE: Quadcopter Guy – Read entire story here.

Filming for AWAY

Image IMG_5983-e1425230698838-768x1024.jpg

Processed with VSCOcam with m3 preset

When out filming AWAY I had no idea what the story was about. It was a mystery to me, but I was just happy to be out collaborating with someone making epic visuals. Now that the film has come out, it’s pretty reflective of the past year of my life. I was entering into a whole new world of business and a whole new industry for that matter. At a certain point I just wanted to get away and forget about everything that has happened. I started to run, then finally realized that I needed to forgive myself and upon receiving that forgiveness was offered a second chance. To me, the film is very reflective of my experience. Click “Continue Reading” to watch the full film.

Processed with VSCOcam with f2 preset

More photos, videos, and experiences from the shoot!

Processed with VSCOcam with g3 preset

On the journey I saw someone taking photos on the side of the Tioga pass in his Range Rover I remember seeing on social media. This was the 1st time I would meet Barry, and by chance that we meet for the 1st time int he mountains when I had such an important decision to make the day before. Barry is so awesome and has such a big heart! I really value his friendship.

Sometimes a set of experiences run deeper than any set of words someone can offer you as advice. As I set out to film aerial shots for AWAY I was in a deep contemplative time in my life. Placed before me was one of this biggest decisions of my life. It was something that nothing could have gotten me ready for besides living through it and making the wrong choice.

Processed with VSCOcam with c1 preset

It’s not just making the wrong decision that made an impact, but it was the months of depression and desperation that I was feeling during that time. I would be very hard on myself, holding myself and my employer to an extremely high standard. I would be in a constant battle with myself over my purpose in life, if this is what I’m supposed to be doing, and what else I should be trying to seek. It was a hard time, but I was able to get out of it after talking it over with some friends.

Processed with VSCOcam with c1 preset

Through all this I’ve realized that people are so scared to make mistakes in life, and everything I’ve learned about myself during that time has helped me grow exponentially. The biggest gift that this experience gave me was learning how to offer and accept forgiveness for myself. I have held so much againced myself that I was creating walls around myself that would manifest itself as complete loneliness.

Processed with VSCOcam with c1 preset

SOURCE: Quadcopter Guy – Read entire story here.

White Face Panoramas

Image Untitled_Panorama2_Small-1024x390.jpg

Untitled_Panorama2_Small

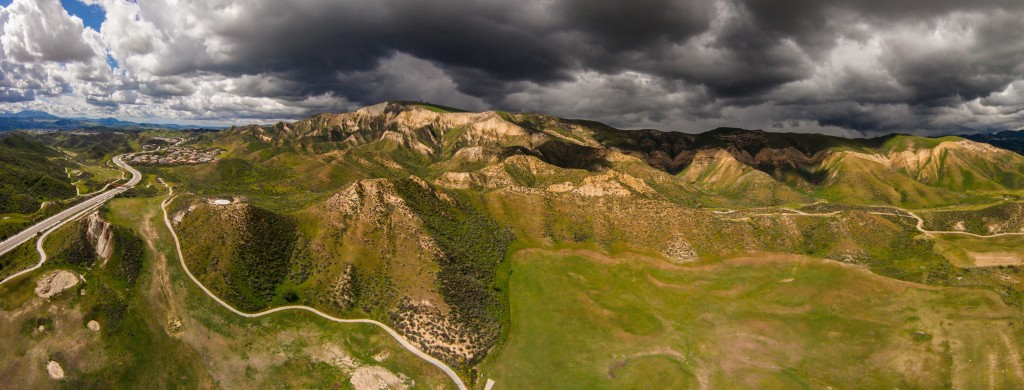
One of the greatest thing about flying a multi rotor is that your not limited to one spot to take photos from. When your done with one just zoom around and change your perspective to get a different shot. In the panorama above I was over the driving range to get a better view of the hill in the background. For the bottom exposure I moved about 1000 feet to the other side of the road so it was just in frame throughout the image.

Untitled_Panorama4_small

As I was shooting panoramas I was watching the clouds shadow move over the valley pretty fast so I raced to shoot another series of images for panoramas. It was such a spectacular site to see the clouds moving in so fast from the view live from the Phantom Vision 340 feet up and 700 feet away(Thats my white car in the parking lot). Happy flying everyone!

SOURCE: Quadcopter Guy – Read entire story here.

Family Portrait With A Drone

Image G0023060_33333-1024x683.jpg

DCIM114GOPRO

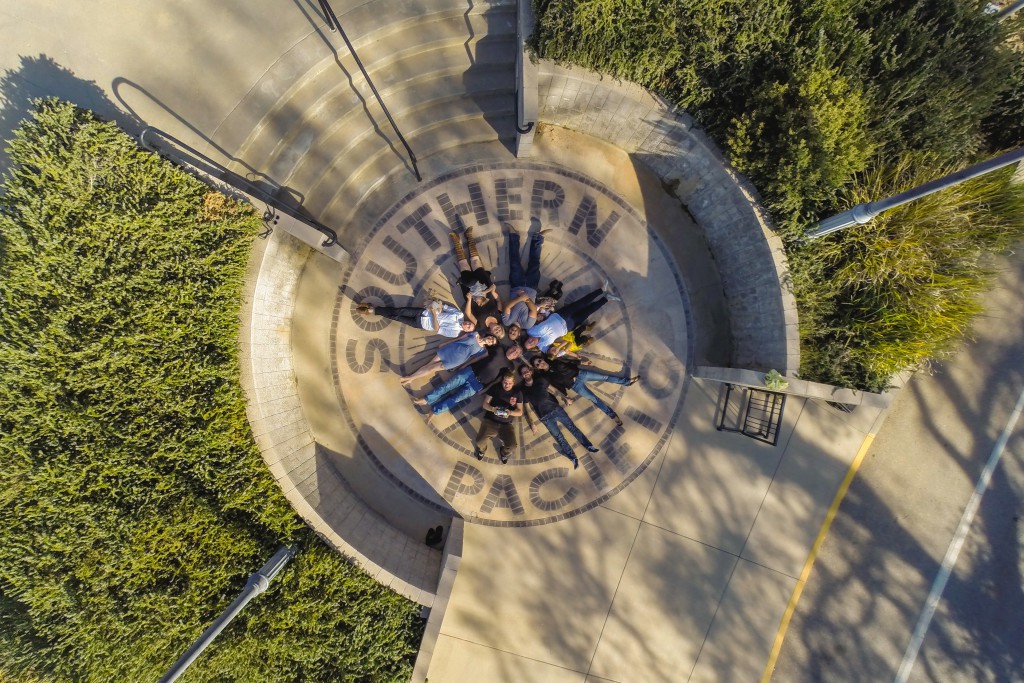
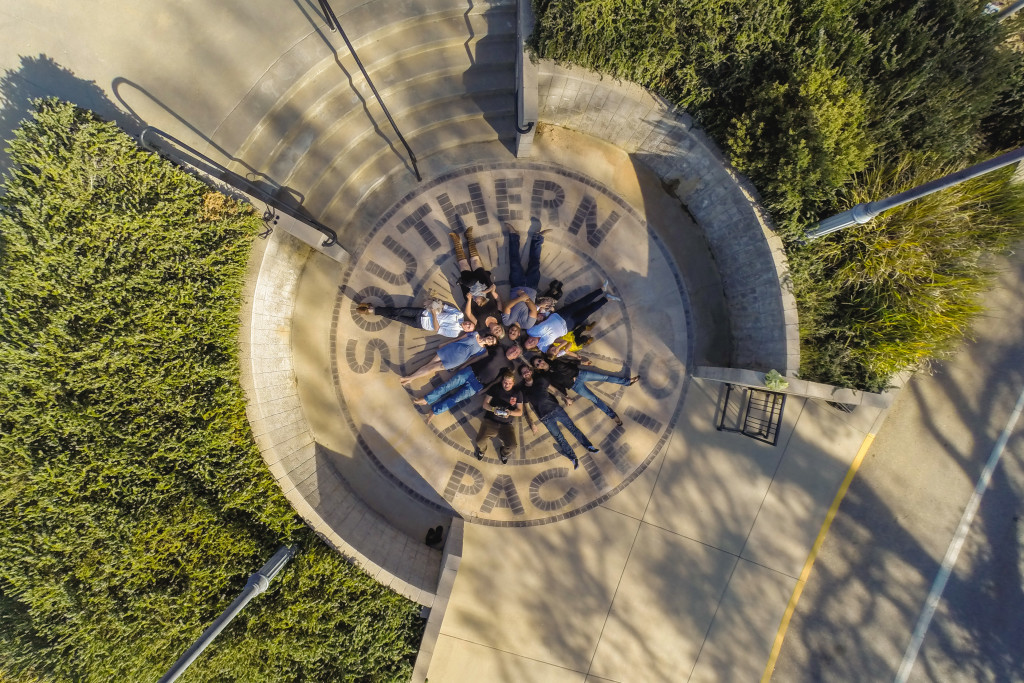
This year when my family got together for the holidays we wanted to do things a little bit different. Instead of our usual family photo with us standing up, we found a awesome circle that we decided to lay in. I flew my Phantom 2 with a GoPro Hero 4 on time-lapse mode and flew above us. You can see me on the bottom of the photo looking at my monitor composing the image. After shooting some photos, I recorded a video and did the same move above us. This was one of the most unique family photos we’ve taken yet, and we’ll have to see where we can go to out-do this one next year.

SOURCE: Quadcopter Guy – Read entire story here.

G-Shock Watch Commercial

Image DJI_0015-copy-1024x576.jpg

DCIM100MEDIADJI_0015.JPG

Sometimes when your flying for productions you don’t see the final product for months, so when I saw this edit for the G-Shock watches so soon I was super excited. I teamed up with Drone Dudes and executed the aerial shots that they needed for the video.

One of the challenges I ran into when using the Drone Dude’s phantom was using the 5.4 mm RageCam Lens. I never flew with the rage cam lens before and a lot of the shots required that the camera points straight down. While the biker rode around I kept the camera at a 45 degree angle to have a little bit of forgiveness-room.

Processed with VSCOcam with m5 presetWorking for Drone Dudes provides a really interesting dynamic as for how we book our jobs, to when I go out and fly. Recently I’ve been working with Drone Dudes as a lead pilot heading out on different film shoots. Being a pilot for Drone Dudes is best for me as one of my weak points is bidding on jobs with clients. It allows me to focus on my piloting skills and helps me concentrate on translating the clients vision into a reality.

SOURCE: Quadcopter Guy – Read entire story here.

FPV Flying @ The Park

Image IMG_2807-1024x679.jpg

Processed with VSCOcam with s1 preset

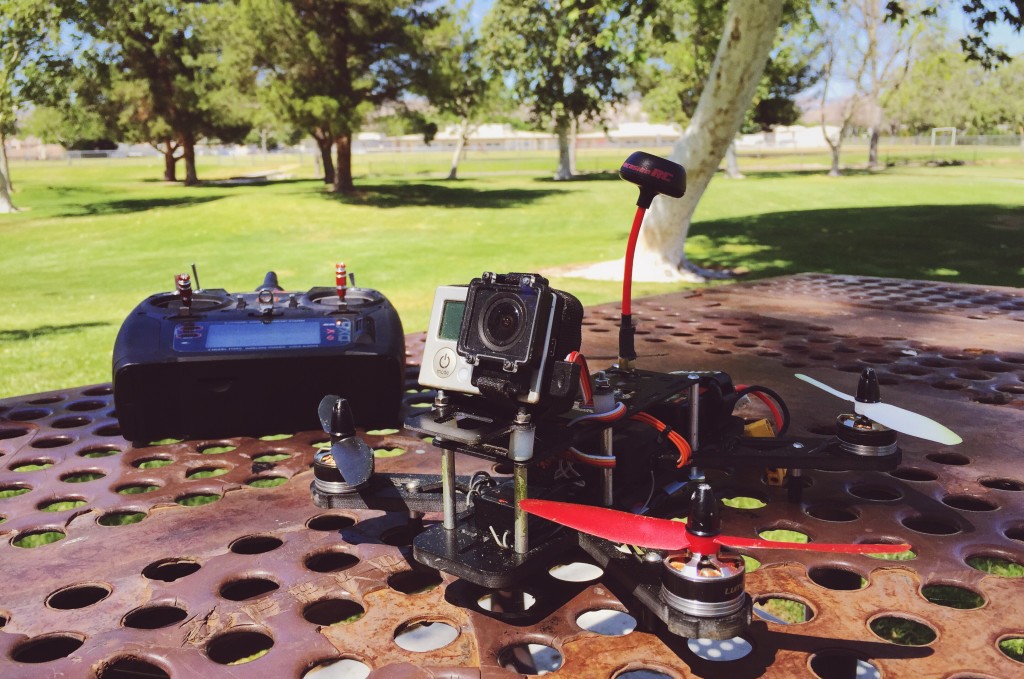
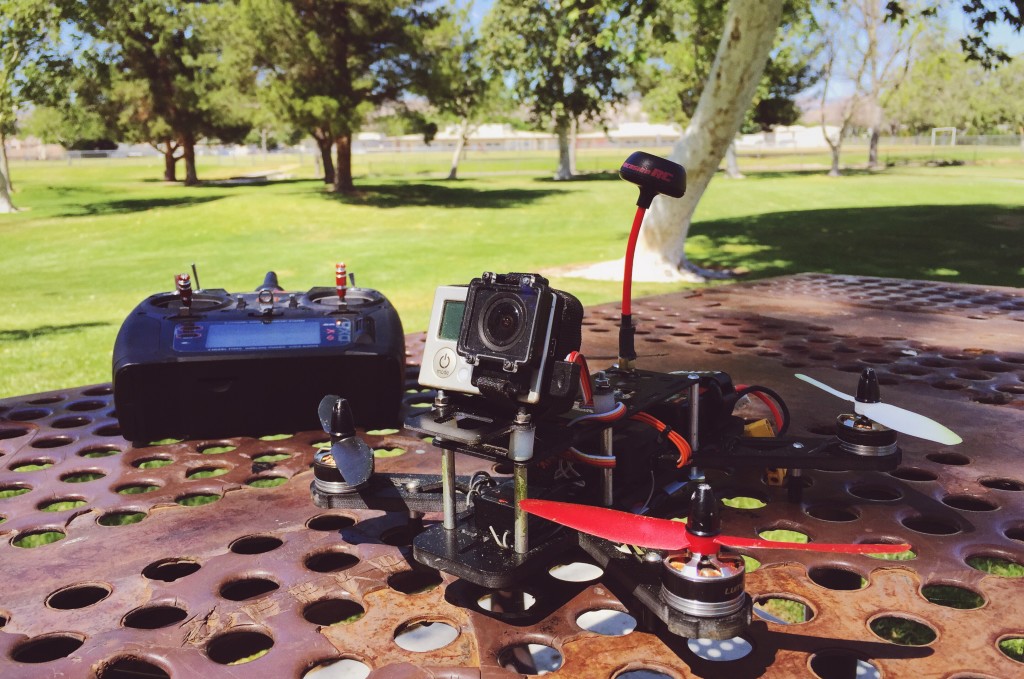
When I have a day off or an afternoon available theres a high chance you’ll find me at a park flying this little guy. This quadcopter is the infamous QAV250 frame, Graupner 5×3 props, Simok K 12A ESC’s, Lumenier 2206 2000kv motors, and a fatshark 600mw transmitter.

SOURCE: Quadcopter Guy – Read entire story here.

Chris Anderson launches the DoneCode Foundation

Image chris-anderson-3d-robotics-hero.jpg

Here’s the welcome post by Chris Anderson that announces the birth of the Dronecode Foundation, in partnership with the Linux Foundation.

Chris Anderson, CEO of 3D Robotics

####################################################

Welcome to the Dronecode Project

I’m thrilled to announce our partnership with the Linux Foundation to create the new Dronecode Foundation, a non-profit organization that brings together the leading open source UAV software projects under the professional management and leadership of one of the world’s foremost open innovation organizations.

For me personally, this is the culmination of a half-lifetime of work on open innovation and in particular a seven-year journey in drones that started with my children and me experimenting with Lego Mindstorms robotics parts and RC airplanes back in early 2007 (I love that first video we shot, shaky as it was; it was a life-changing moment).

I was amazed by what was possible with sensors, embedded microprocessors and GPS, but knew nothing about drones. So I set up a community called DIY Drones, mostly to “ask dumb questions in public”. Two wonderful things happened as a result. First, lots of people generously answered my dumb questions and helped me learn about all the disciplines that come together in aerial robotics, from software and electronics to aerodynamics and data analysis. Second, the existence of this community created a place for other people to ask their own questions, and in those early days of amateur UAVs, everyone was learning as we went. Even the experts in one domain had to learn about the others that had to come together to take robots into the air.

The DIY Drones site quickly grew, and is now one of the largest robotics communities in the world (nearly 60,000 active members and as much as 2 million page views per month). But it wasn’t just talk: members were collaborating on electronics, software and aircraft designs, first informally and then increasingly in organized open source projects, including the APM/ArduPilot platform (including ArduCopter, ArduPlane, ArduRover), Mission Planner, DroidPlanner and countless others, from radio/telemetry to video. Many of these stood on the shoulders of other open source innovation projects, especially the Arduino open computing platform, which gave many of these projects the “Ardu” prefix.

At the same time, leaders in the academic robotics world were also embracing open innovation, and we soon found a kindred spirit in Lorenz Meier from ETH in Zurich, one of the best robotics research institutions, and the PX4 and MAVlink projects that he leads. Soon we joined forces, and today the Pixhawk autopilot platform represents the fruits of that collaboration, a joint effort of an open source community, a premier academic institution and a Silicon Valley company (3D Robotics, which I co-founded in 2009 with Jordi Munoz, who I met through DIY Drones.)

Today, I’m proud that this platform has been adopted by more than 100,000 users and is helping bring advanced UAV technology to regular people, allowing them to do extraordinary things from Hollywood-quality aerial video to crop-mapping, 3D-scanning of buildings. It’s a classic example of the power of democratizing a technology; we are entering the consumer and commercial drone age and I’m delighted that an open source platform is helping lead the way.

Now that we have reached this level of adoption and maturity, it’s time to adopt the best practices of other highly successful open source projects, including professional management and governance structures, to ensure the continued growth and independence of these efforts. There is no better organization to lead this than the Linux Foundation. Not just because of the extraordinary success of Linux itself, but also because of all the other collaborative projects that it helps run, allowing each to reach the next level of participation, performance and innovation. The combination of independence and a clear path for corporate participation and adoption while protecting open source ideals is something these projects have always been built on, and the experience and reputation of the Linux Foundation ensures that those values will be embraced and preserved in our own projects as the industry around them grows.

The creation of a formal non-profit organization to organize, lead and coordinate these projects also makes it easier for companies who want to embrace open innovation in their own UAV and robotics efforts. This allows them to participate in a more formal way that helps ensure that they can contribute back to the community, in everything from code to people power to financial resources. So I’m particularly delighted to welcome our company launch partners, including such giants as Intel, Qualcomm, Box and Baidu in addition to UAV leaders such as Yuneec, Walkera and my own 3D Robotics.

Why now? Not just because drones are hot and open innovation is hotter 😉 Most of all, it’s because as our platforms have matured, they are increasingly heading in the same direction as Linux itself. The extraordinary improvements in mobile hardware technology (thanks Intel and Qualcomm!) and cloud technology (thanks Box and Baidu!), means that our community and software is increasingly running on gigahertz-class Linux computers and with constant broadband connections to the cloud. That means that the opportunity for us to join forces with the broader Linux and Embedded Linux communities is now, and the Linux Foundation is the perfect place to lead that convergence.

Welcome to Dronecode. I can’t wait to see what this community creates next.

By Chris Anderson, CEO 3D Robotics

Souce: Dronecode.org

SOURCE: Personal Drones – Read entire story here.